 Save
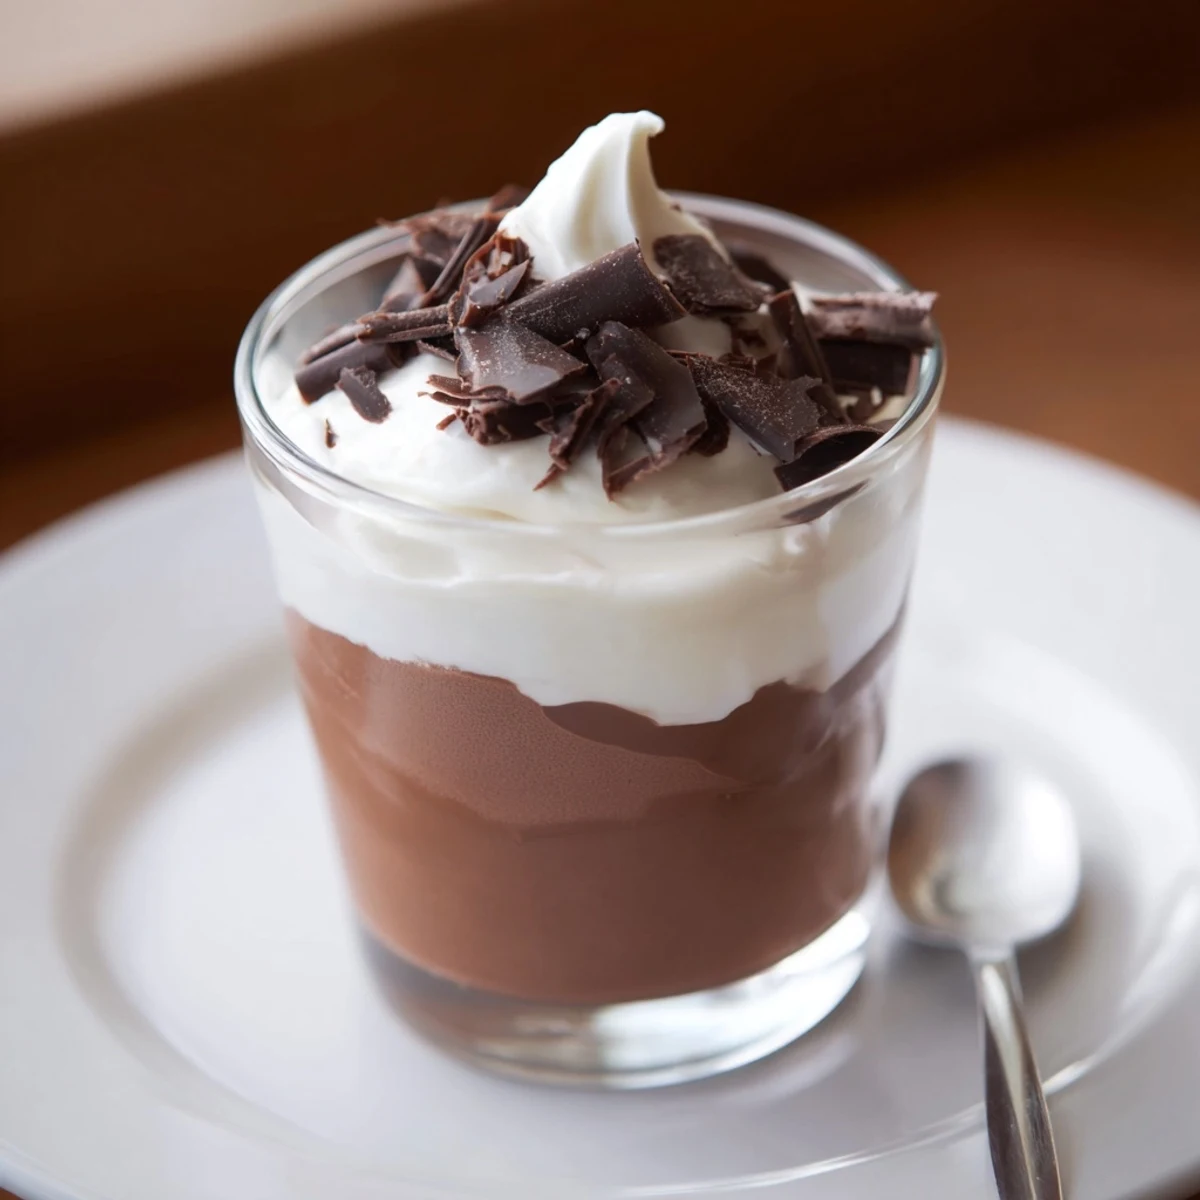
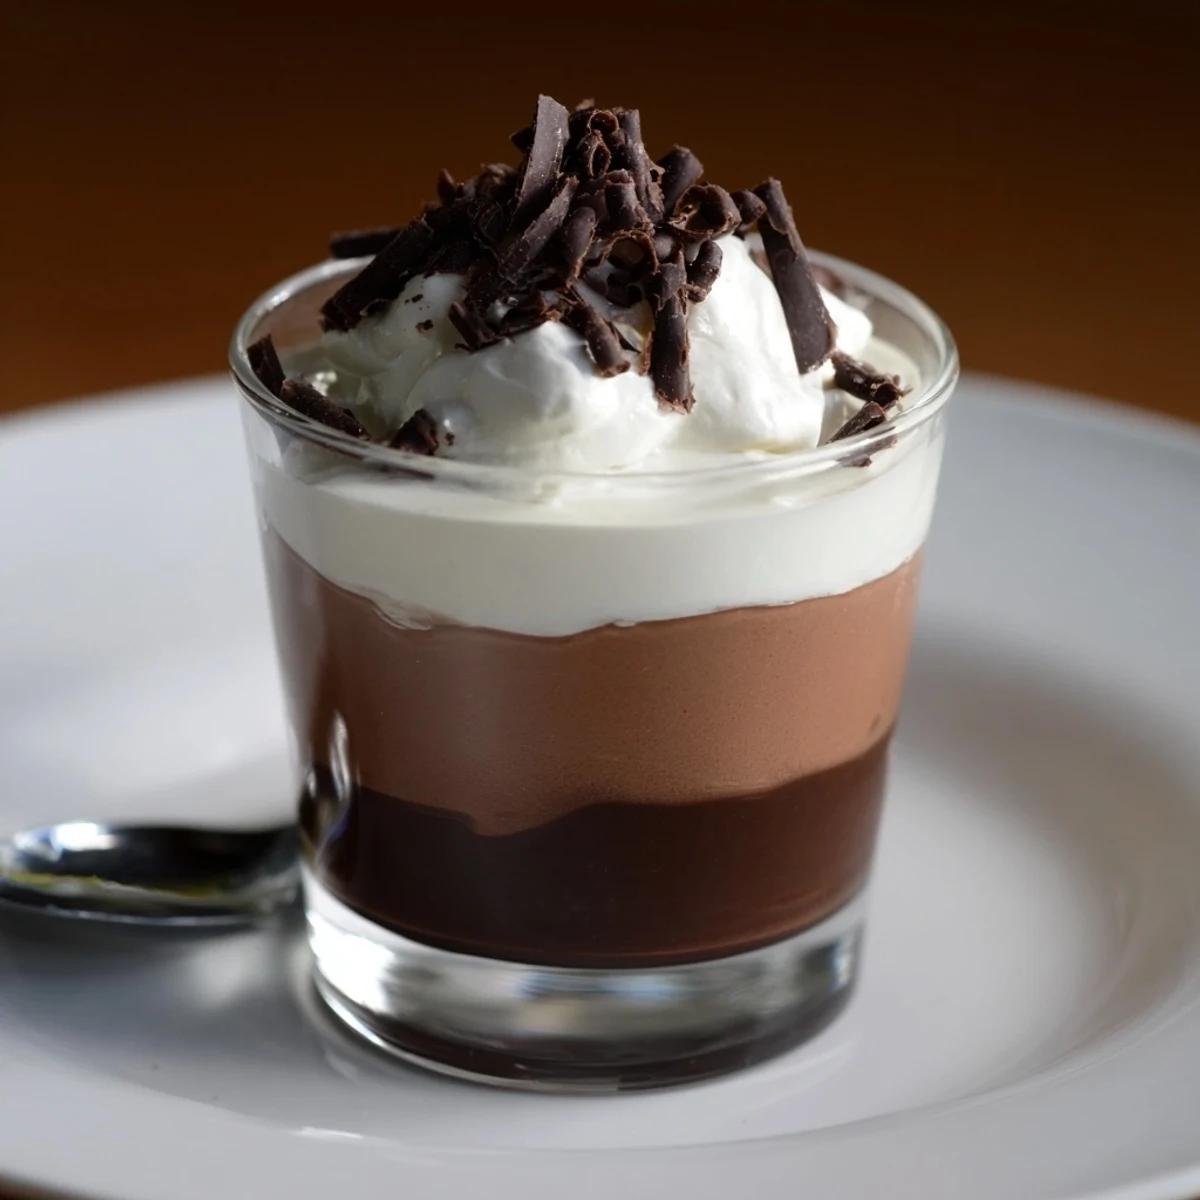
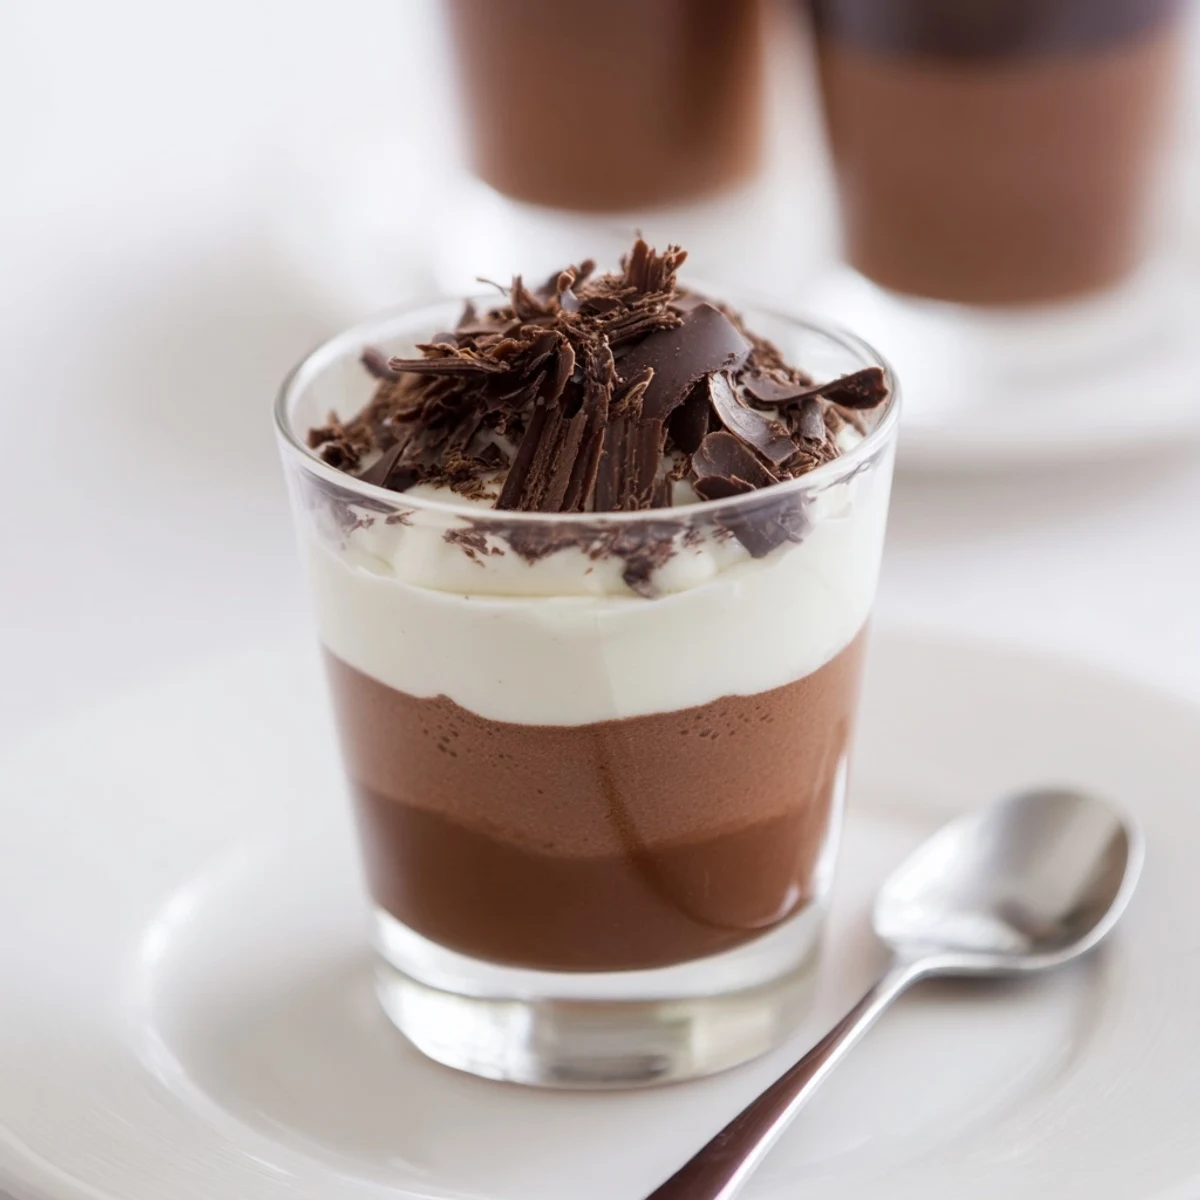
Save Layer three mousses—dark, milk and white—into individual cups for a striking, silky dessert. Melt each chocolate gently over a bain-marie or briefly in the microwave, cool slightly, then fold into pale, whisked egg yolks and sugar. Lightly whip cold cream to soft peaks and fold in to keep an airy texture. Spoon or pipe each layer, chilling cups between layers for defined strata. Garnish with shaved chocolate or a dusting of cocoa and chill at least 1 hour before serving; quick-freeze between layers for a faster set.
The kitchen takes on a quiet sort of excitement when there are three kinds of chocolate melting in separate bowls. I first put these triple chocolate mousse cups together late one winter afternoon, shivering by the window, craving stark contrast to the cold outside. Instead of making something sturdy and warm, I opted for airy, indulgent layers that felt almost celebratory. The first spoonful was a revelation – an edible crescendo, somehow greater than the sum of its parts.
The last time I brought a tray of these mousse cups to a friends potluck, someone actually paused mid-conversation after a taste. Even the person who ordinarily ‘doesn’t like dessert’ reached for seconds and asked if they were difficult to make. I just grinned, thinking about the small chaos of melting chocolates and whipped cream splatters all over my countertops. It felt like my secret party trick finally got its moment to shine.
Ingredients
- Dark chocolate (100 g, minimum 60% cocoa): Provides a deep flavor and structure to anchor the bottom layer; let it cool a bit after melting so it doesn't seize when mixed.
- Milk chocolate (100 g): Lends creaminess and nostalgic sweetness to the middle layer, just be sure to use chocolate that melts smoothly.
- White chocolate (100 g): Sweet, buttery, and a little tricky: melt it slowly in short bursts, as it can scorch fast.
- Egg yolks (3, one for each layer): Give the mousse a rich silkiness while helping it set; gently whisk with sugar for best texture.
- Sugar (4.5 tbsp, divided): Balances the slight bitterness of dark chocolate and enhances the other two layers; always whisk until pale before combining.
- Heavy cream (300 ml, divided and cold): This is what makes each mousse so airy and light; whip just until soft peaks form to avoid a dense texture.
- Shaved chocolate or cocoa powder (for garnish): Optional, but adds beautiful contrast on top and a hint of crunch if you use dark chocolate shavings.
Instructions
- Melt the dark chocolate:
- Set a saucepan of water to barely simmer, then melt the dark chocolate in a heatproof bowl above the steam or using short microwave bursts until glossy and smooth. Let it cool just enough so it feels warm when you dip a finger in.
- Make the dark chocolate mousse:
- Whisk an egg yolk with 1 1/2 tbsp sugar until thick and paler. Fold the cooled chocolate in gently, then whip 100 ml cream to soft peaks and incorporate with wide, sweeping motions; spoon into the base of your cups and pop them in the fridge.
- Layer the milk chocolate mousse:
- Repeat the melting and mixing steps with milk chocolate and its egg yolk and sugar, then fold in another 100 ml whipped cream for a luscious middle layer. Gently spoon over the set dark chocolate mousse—wipe the cup edges for those clean layers.
- Finish with white chocolate mousse:
- Melt the white chocolate carefully — low and slow is key — and blend it with its whisked yolk and sugar. Fold in the last batch of whipped cream, then pipe or spoon across the milk chocolate layer; smooth the tops and chill thoroughly for at least an hour.
- Garnish and serve:
- Right before serving, scatter with dark chocolate curls or a whisper of cocoa powder so each cup looks extra inviting. If they’ve been chilled a long time, let sit out for a few minutes to warm slightly for best texture.
 Save
Save There was a birthday where a group of us toasted over takeout boxes, but the only thing anyone photographed were the tiny mousse cups lined up on the table. A friend stole an extra spoonful of chocolate from a leftover bowl in the fridge, laughing that the scraps tasted just as good. Somehow that night, these decadent treats brought a sense of celebration to the everyday clutter in my kitchen. These aren’t just desserts—they’re a reason for gathering, even if it’s only for dessert at midnight.
All About Layering
Each mousse should have just enough time to settle before the next is added, so the layers remain crisp and beautiful. I set all my glasses onto a rimmed tray so I can pop the whole thing in or out of the fridge in one go. For perfectly even layers, I use a piping bag, but a steady spoon and a little patience works too. If the top layer dips, just add a little extra garnish for camouflage.
Chocolate Choices Make a Difference
It’s amazing how much flavor shifts with different brands of chocolate: some are creamier, some bolder, some just right for melting and whipping. I learned quickly to check chocolate for added ingredients if serving friends with allergies—it’s worth seeking out the best bars you can get. Don’t skimp or substitute here; the right chocolate does all the heavy lifting. Each brand brings out a little something different in the final mousse.
Serving and Storing Tips
Individual cups are the ultimate in stress-free serving; no messy cutting or portioning, just grab and go. If you want a head start, make them the night before and keep chilled under plastic wrap. Just wait to garnish until the last minute for the freshest look and taste.
- Use clear cups or glasses so the layers shine in all their glory.
- If pressed for time, let each layer set fifteen minutes in the freezer between pours.
- Bring to room temperature for five minutes before eating for the dreamiest texture.
 Save
Save I hope these triple chocolate mousse cups give you an excuse to celebrate even the simplest moments. When you serve them, don’t be surprised if people remember the dessert long after the meal is finished.
Recipe FAQs
- → How do I melt chocolate without it seizing?
-
Melt slowly over a bain-marie or in short bursts in the microwave, stirring frequently. Keep water away from the chocolate and remove from heat before it is fully melted to finish stirring until smooth.
- → What gives mousse its silky texture?
-
The combination of properly tempered melted chocolate, gently folded egg yolks, and softly whipped cold cream preserves air and creates a light, silky mouthfeel. Avoid over-folding to keep the mousse airy.
- → How can I achieve clean, defined layers?
-
Chill each layer briefly until slightly set before adding the next. Spoon or pipe carefully and smooth the surface gently; a quick chill or short freeze between layers helps form distinct strata.
- → Can I make this ahead and how should I store it?
-
Yes. Cover and refrigerate for up to 48 hours. For firmer set, freeze for up to a week and thaw in the fridge for 30–60 minutes before serving. Garnish just before serving to retain texture.
- → Any tips for substituting ingredients?
-
Use high-quality chocolate for best flavor. For dairy-free versions, swap heavy cream with a thick coconut cream and choose dairy-free chocolates; note texture and flavor will change. Pasteurized eggs or custard-based techniques can improve safety concerns.
- → How can I add extra depth of flavor?
-
A splash of coffee liqueur or strong espresso folded into the dark layer enhances bitterness and complexity. Orange zest, toasted nuts, or a pinch of sea salt can also brighten and balance the sweetness.
