 Save
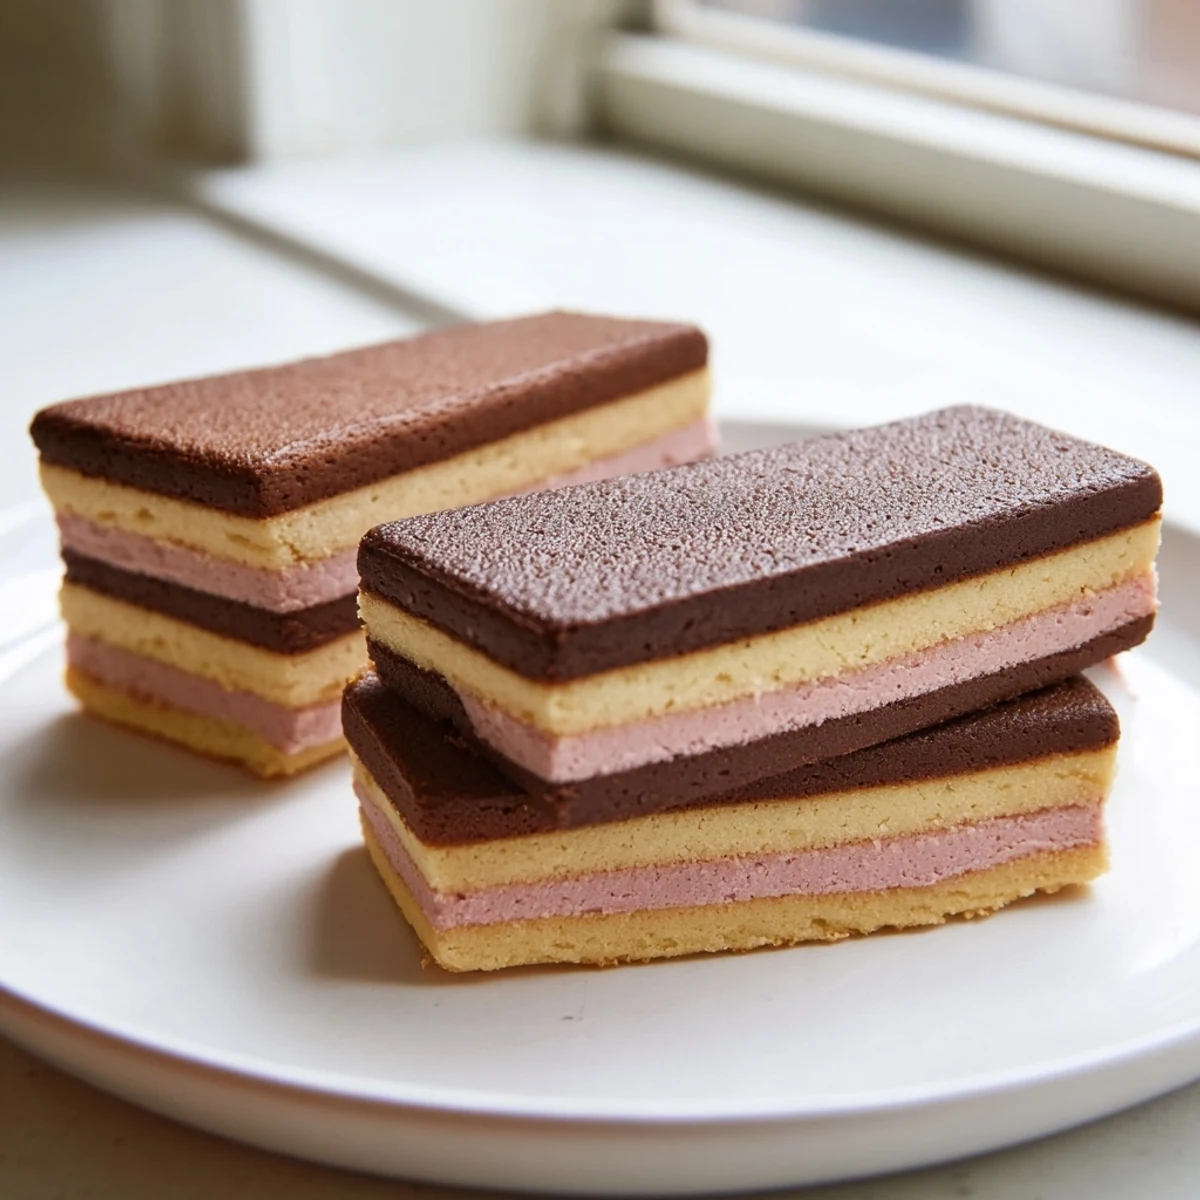
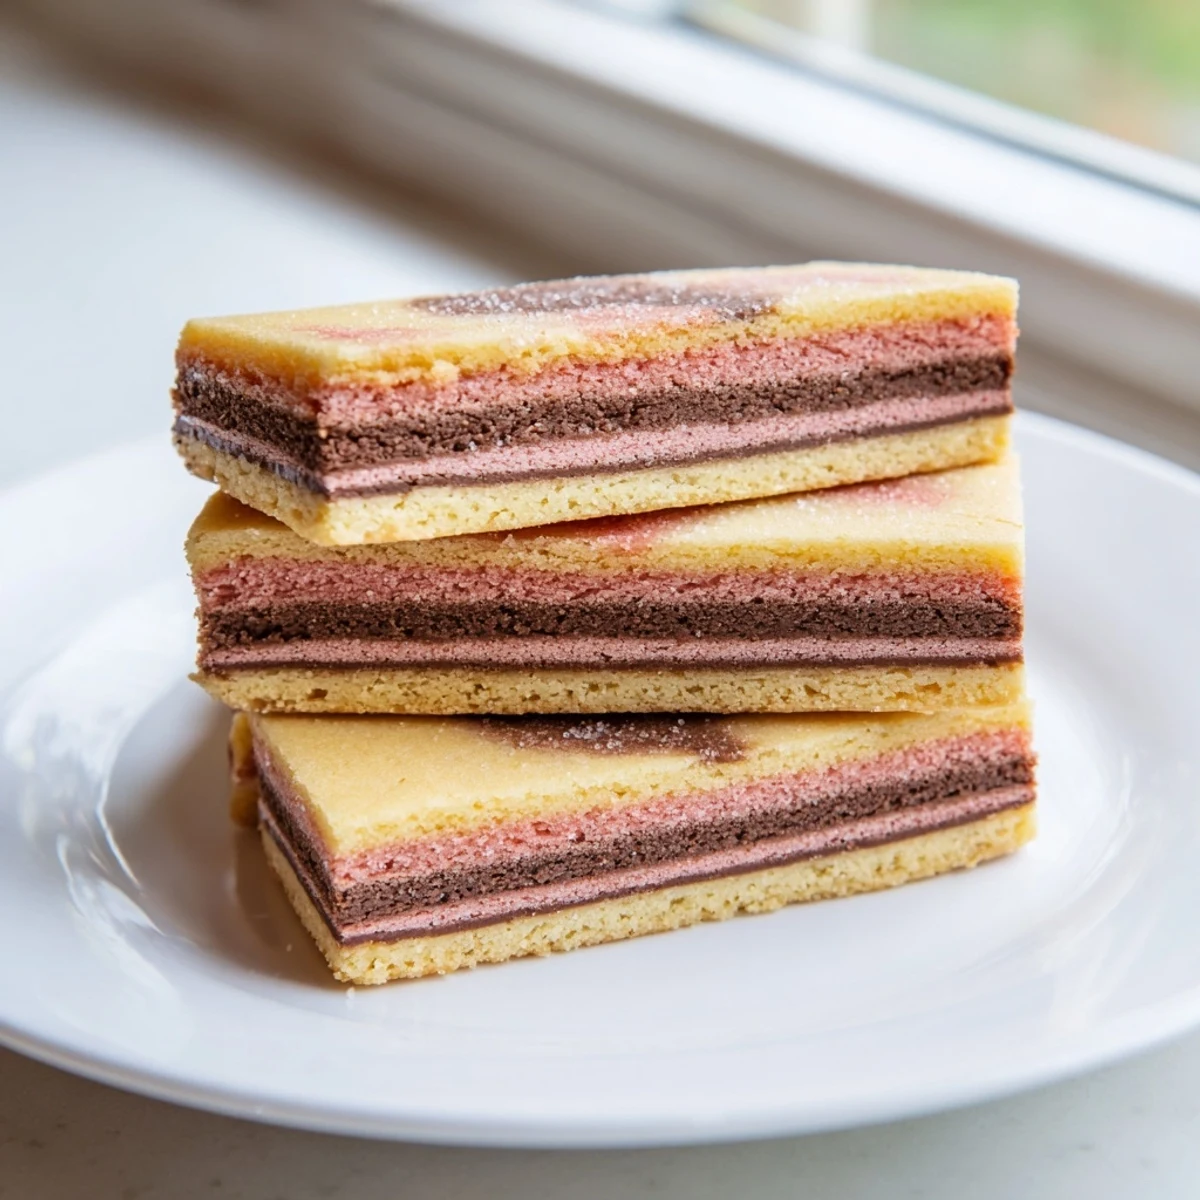
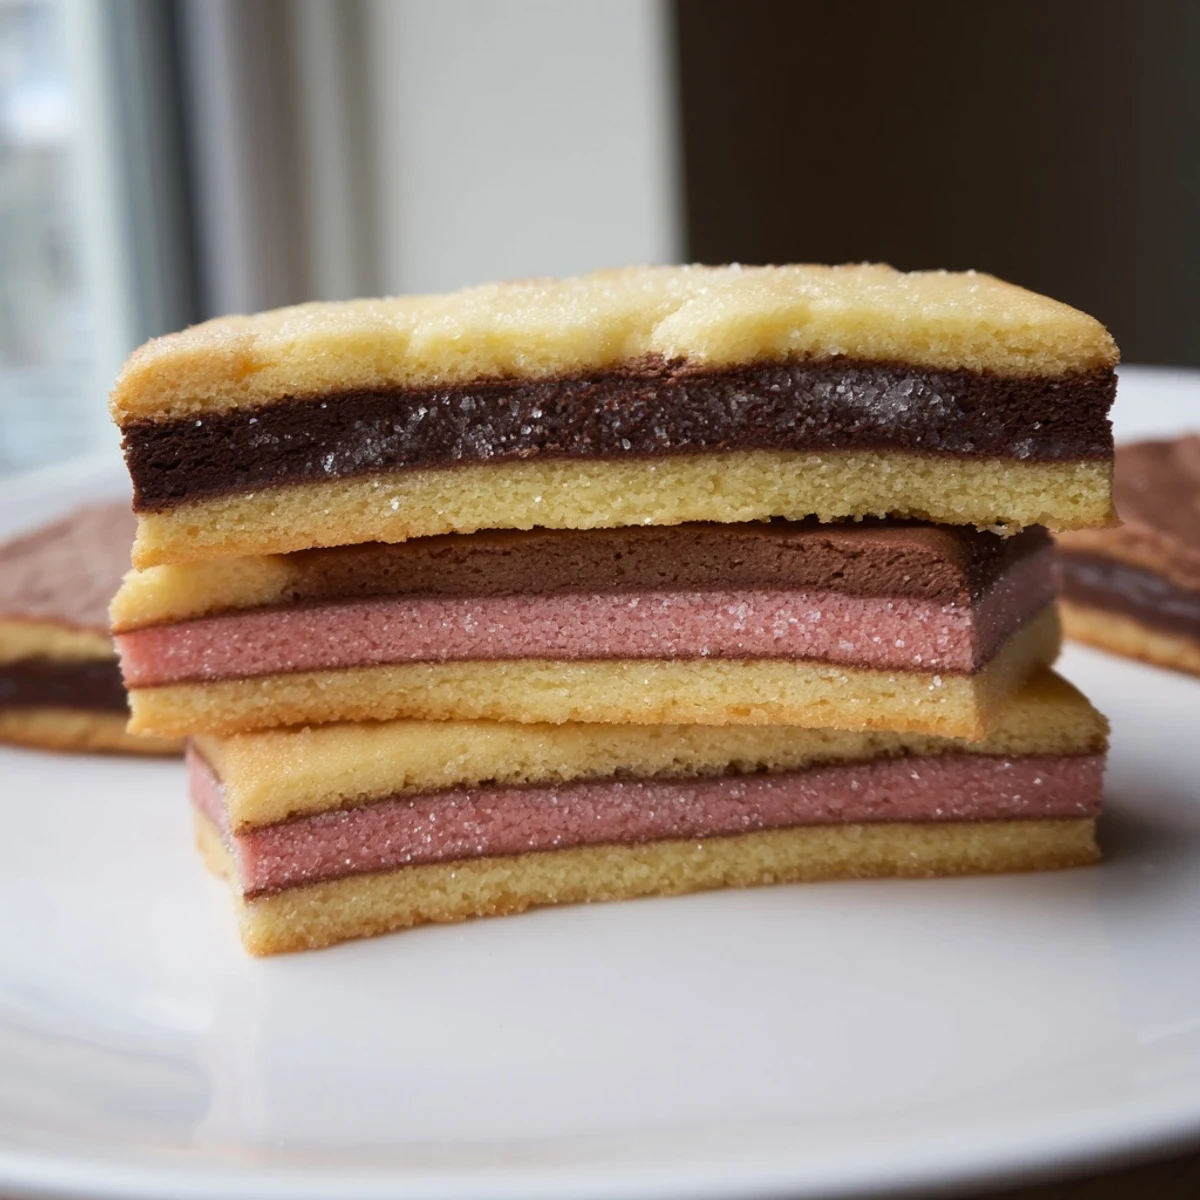
Save These Neapolitan Cookies bring together three classic flavors—rich chocolate, smooth vanilla, and sweet strawberry—in one beautiful layered treat.
Start with a single buttery dough, divide it into three portions, and flavor each with cocoa, vanilla, or freeze-dried strawberry powder. Stack the layers, chill until firm, then slice and bake for a stunning tri-colored cookie.
Taking about 90 minutes including chilling time, they yield 36 cookies perfect for dessert platters, holiday baking, or everyday snacking.
The smell of butter creaming with sugar still pulls me straight back to my grandmothers kitchen on a rainy Saturday afternoon when she decided cookies should look as cheerful as they taste. Neapolitan cookies were her party trick, three flavors stacked into one slice and bake wonder that looked fancy but came together with the patience of a crossword puzzle. The chocolate vanilla strawberry trio was never negotiable in her house. I burned my first batch because I wandered off to watch cartoons, a mistake I have never repeated.
I brought a tin of these to a friends potluck last summer and watched a quiet room turn into a full debate about which layer was best. The strawberry faction was vocal, the chocolate loyalists were stubborn, and someone quietly ate six cookies while everyone else argued. That is the energy these bring to a table.
Ingredients
- All-purpose flour (2½ cups): The backbone of the dough, and spooning it into the cup rather than scooping prevents dense, sad cookies.
- Baking powder (1 tsp): Just enough lift to keep these tender without puffing away the clean layers.
- Salt (½ tsp): Do not skip this, it is what makes the butter taste like butter and the chocolate taste deeper.
- Unsalted butter, softened (1 cup): Room temperature butter is nonnegotiable here, cold butter leaves streaks and uneven layers.
- Granulated sugar (1¼ cups): Creaming this with butter until pale and fluffy is the step that builds the texture.
- Large eggs (2): Added one at a time so the dough stays smooth and emulsified.
- Pure vanilla extract (2 tsp): The quiet hero of the vanilla layer, use the real stuff if you can.
- Freeze-dried strawberry powder (1 tbsp): This is the trick that gives the pink layer real fruit flavor without adding moisture that would wreck the dough.
- Unsweetened cocoa powder (2 tbsp): Gives the chocolate layer a deep, fudgy personality without making it overly sweet.
- Milk (1 tsp): Just a splash to help the cocoa blend smoothly into the dough.
Instructions
- Whisk the dry team together:
- In a medium bowl, whisk the flour, baking powder, and salt until evenly distributed. Set it aside so it is ready when the wet ingredients call for it.
- Cream butter and sugar until dreamy:
- Beat the softened butter and sugar in a large bowl with an electric mixer for about two minutes until the mixture looks pale, fluffy, and lighter than you expect.
- Welcome the eggs and vanilla:
- Add the eggs one at a time, beating well after each, then pour in the vanilla and mix until everything smells like a bakery.
- Bring it all together:
- Gradually add the flour mixture to the wet ingredients and mix on low just until the last streak of white disappears, overmixing makes tough cookies.
- Split the dough three ways:
- Divide the dough into three equal portions, roughly equal weight works best so your layers bake evenly.
- Build the strawberry layer:
- Knead the freeze-dried strawberry powder into one portion until the color is uniform and gorgeous, like a soft sunset pink.
- Build the chocolate layer:
- Work the cocoa powder and milk into a second portion until it looks rich and smells like brownie batter.
- Leave the vanilla layer be:
- The third portion stays plain and proud, its job is to let the butter and vanilla shine.
- Shape into rectangles:
- On parchment paper or plastic wrap, press each portion into a flat rectangle about 8 by 4 inches, keeping the edges as neat as you can.
- Stack and press the layers:
- Place chocolate on the bottom, vanilla in the middle, and strawberry on top, then press gently so they stick together without smudging the boundaries.
- Chill until firm:
- Wrap the whole slab tightly and refrigerate for at least 45 minutes, patience here is what gives you clean sharp slices later.
- Preheat and prep:
- Heat the oven to 350 degrees Fahrenheit and line your baking sheets with parchment paper while the dough firms up.
- Slice with confidence:
- Use a sharp knife to cut the dough crosswise into quarter inch slices, wiping the blade between cuts keeps the lines crisp.
- Bake until just golden at the edges:
- Arrange the slices one inch apart and bake for 10 to 12 minutes, the centers will look slightly underdone but set as they cool.
- Cool properly:
- Let the cookies rest on the sheet for five minutes, then move them to a wire rack to finish cooling completely.
 Save
Save One Christmas I mailed a box of these to my cousin across the country and she called to say the tin was empty before she even unpacked her suitcase. That is the kind of recipe this is.
Swaps and Twists Worth Trying
Raspberry powder works beautifully in place of strawberry if you want something a little more tart and jewel toned. A few drops of lemon extract and some zest in the vanilla layer turn it into a bright citrus surprise that pairs wonderfully with tea. I once added finely chopped dark chocolate to the chocolate portion and the result was fudgy enough to make a brownie jealous.
Storing and Gifting
These keep beautifully in an airtight container for up to a week, and the flavors actually deepen a little after the first day. For gifting, stack them in a clean tin with sheets of parchment between layers and they will look as impressive as anything from a bakery window. Freezing the unbaked dough log wrapped tightly in double layers means you can slice and bake on demand whenever the mood strikes.
Tools That Make This Easier
A bench scraper helps divide the dough into three even portions without the guesswork that leads to lopsided layers. Parchment paper is your best friend for shaping the rectangles because nothing sticks and cleanup is almost nonexistent.
- Use the sharpest knife in your drawer and wipe it between every few slices for the cleanest lines.
- An offset spatula helps lift sliced cookies onto the baking sheet without distorting their shape.
- Always let the baking sheet cool between batches so the dough does not soften on contact.
 Save
Save Every time I slice into that chilled tricolored log I feel like I am unwrapping something special, and the people eating them always seem to agree. Bake a batch, share them generously, and watch which layer disappears first.
Recipe FAQs
- → Can I make Neapolitan cookie dough ahead of time?
-
Yes, the assembled dough log can be wrapped tightly and refrigerated for up to 3 days before slicing and baking. You can also freeze it for up to 2 months—thaw overnight in the fridge before using.
- → What can I use instead of freeze-dried strawberry powder?
-
If you don't have freeze-dried strawberry powder, combine 2 drops of pink or red food coloring with ½ teaspoon of strawberry extract. You can also substitute raspberry powder or a bit of crushed freeze-dried raspberries for a different berry flavor.
- → Why did my cookies spread too much while baking?
-
Spreading usually happens when the dough isn't chilled long enough. Make sure to refrigerate the layered log for at least 45 minutes until completely firm. If your kitchen is warm, you may need to chill it longer before slicing.
- → How should I store baked Neapolitan cookies?
-
Store cooled cookies in an airtight container at room temperature for up to one week. You can separate layers with parchment paper to prevent the colors from sticking together.
- → Can I add mix-ins to the different dough layers?
-
Absolutely. Mini chocolate chips work well in the vanilla layer, chopped freeze-dried strawberries complement the strawberry portion, and a pinch of espresso powder can deepen the chocolate layer's flavor.
- → Are Neapolitan cookies suitable for dietary restrictions?
-
These cookies are vegetarian but contain wheat, eggs, and dairy. For gluten-free versions, try a 1-to-1 gluten-free flour blend. Dairy-free butter substitutes can work but may slightly alter the texture and flavor.
