 Save
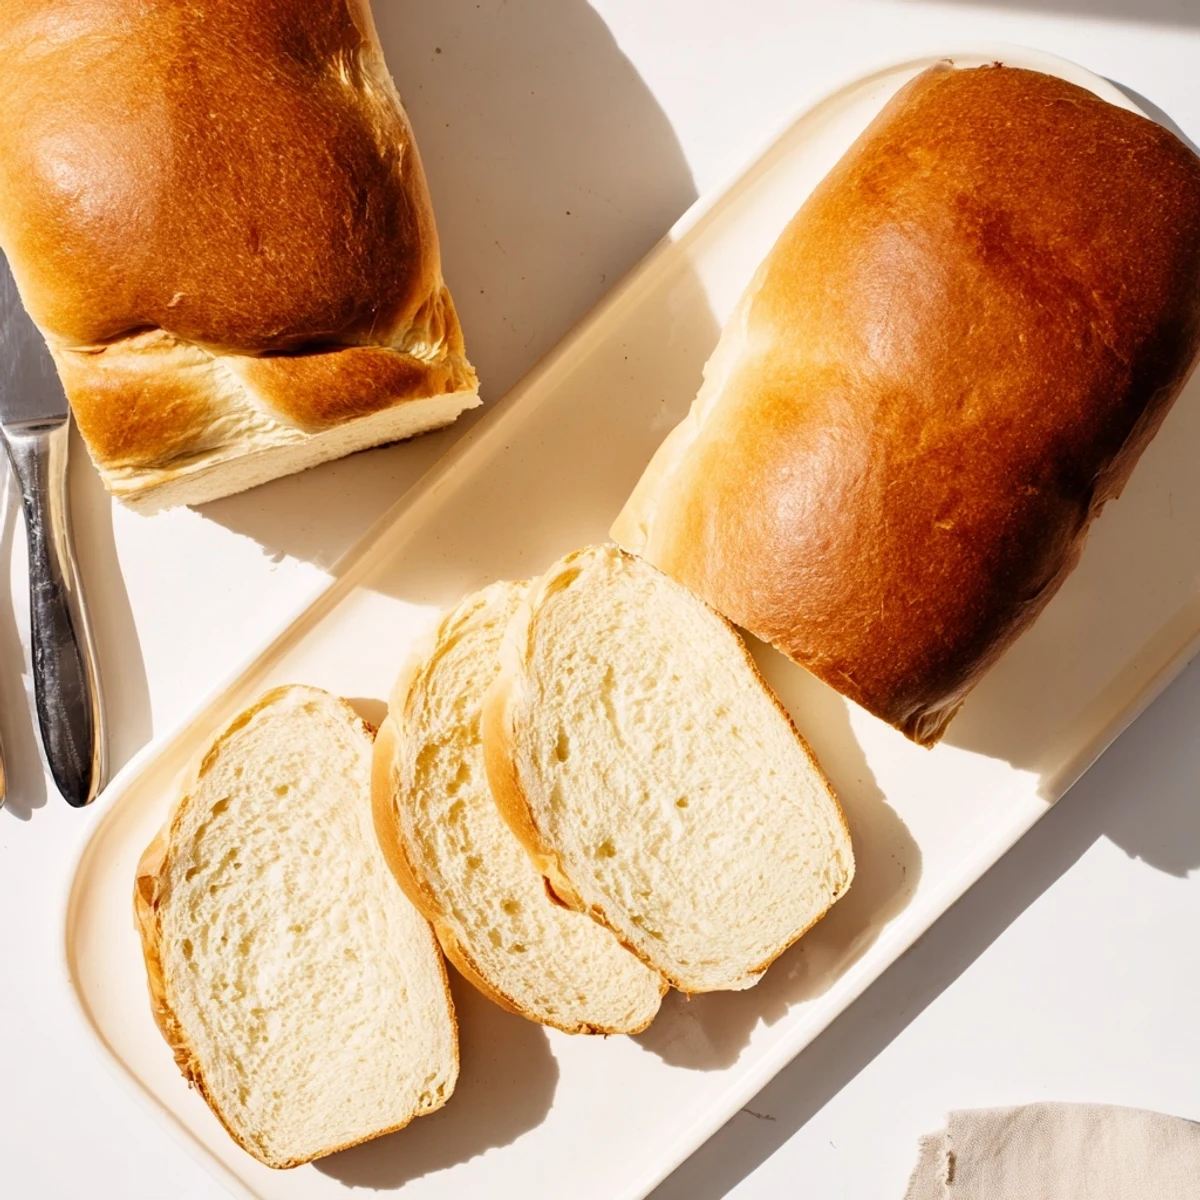
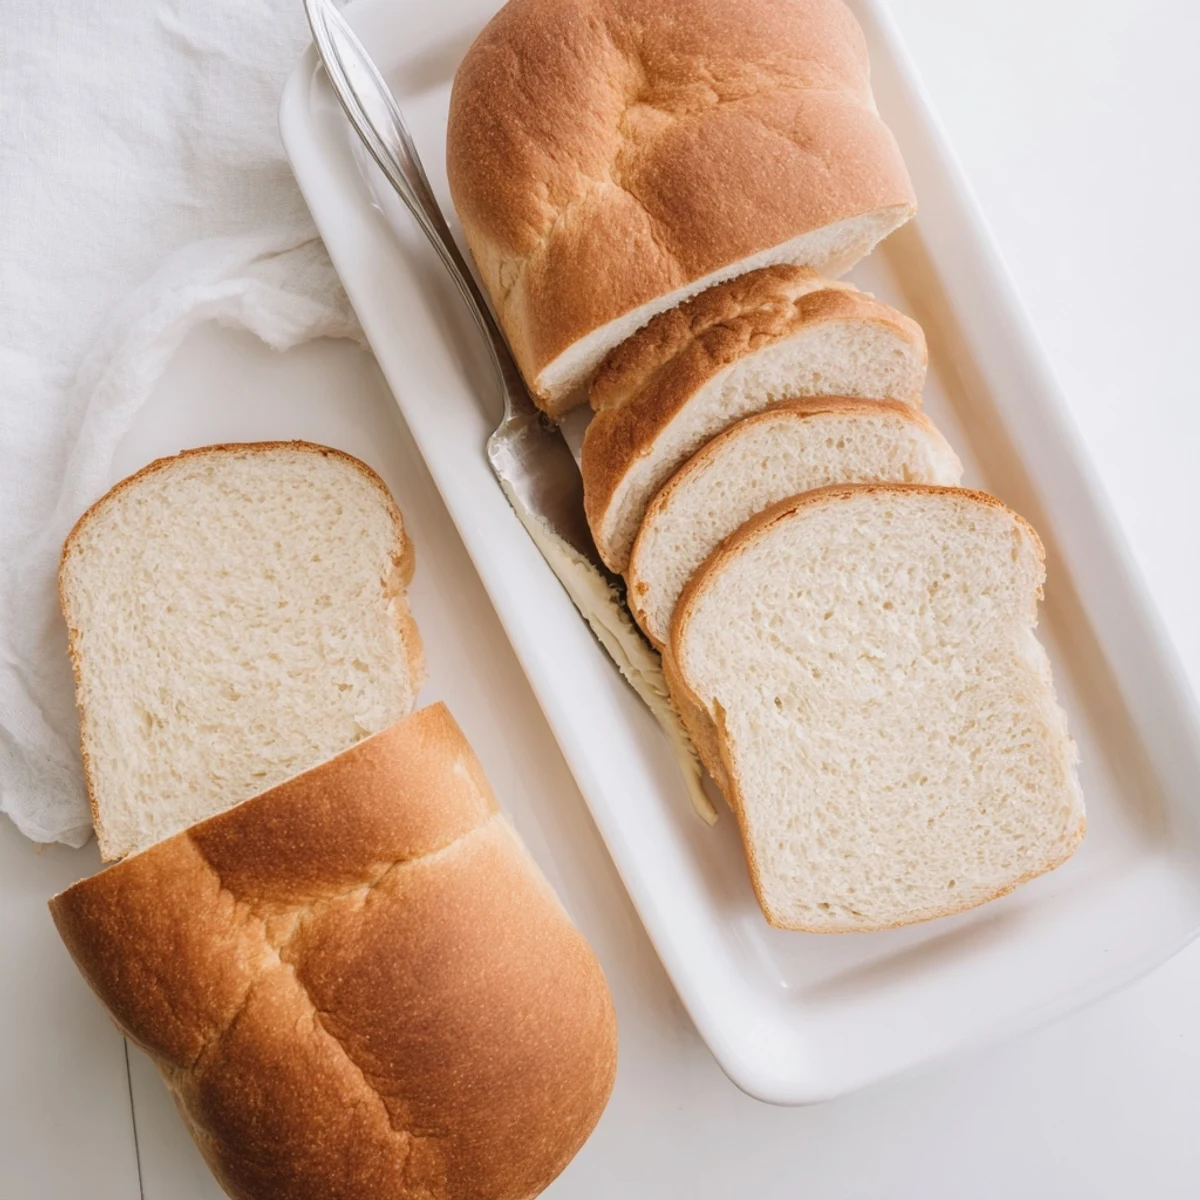
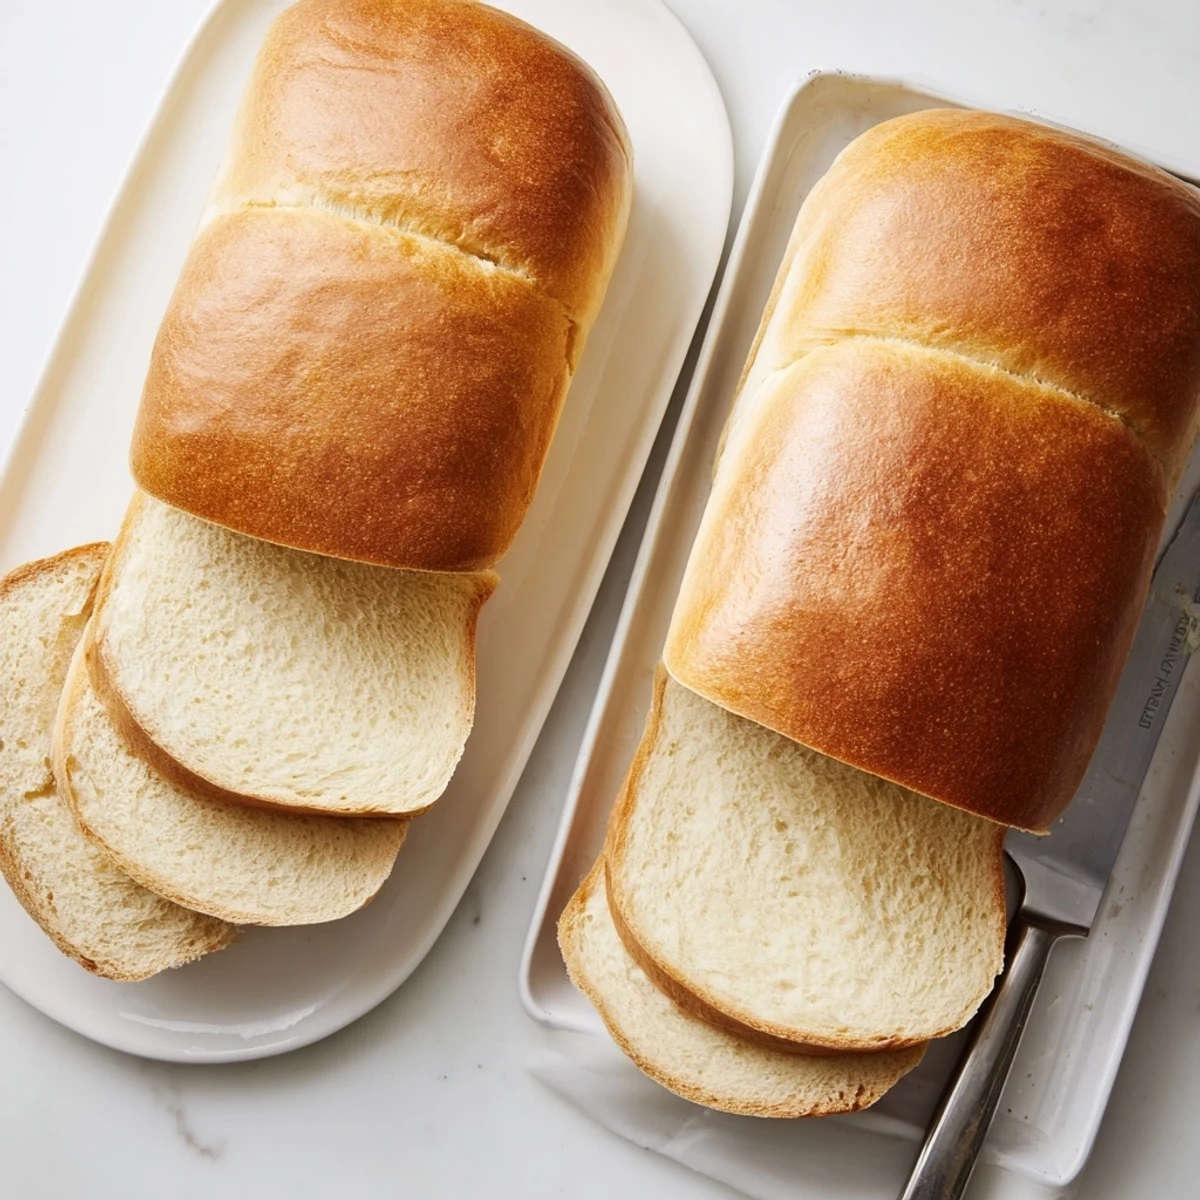
Save This beloved Amish staple delivers two golden loaves of irresistibly soft, pillowy white bread with just a touch of sweetness. The simple combination of flour, yeast, sugar, and oil creates a tender crumb ideal for sandwiches, morning toast, or slathering with homemade preserves.
The straightforward process begins with dissolving yeast in warm water, followed by a brief kneading that develops structure without requiring heavy equipment. After rising until doubled, the dough bakes into beautifully browned loaves that sound hollow when tapped—your signal that they're perfectly done.
Brushing the hot crust with butter adds extra richness and softness, while honey offers a delicious alternative to granulated sugar. These loaves keep beautifully at room temperature for three days or freeze well for longer storage, making them perfect for batch baking.
My grandmother kept a ceramic crock of yeast starter on her counter, but this simple white bread was what she made when she wanted something reliable and comforting. The house would fill with that unmistakable yeasty warmth, the kind that makes you pause in the doorway and just breathe it in.
I remember bringing a fresh loaf to a sick neighbor once, still warm from the oven. She called me two days later to say her grandchildren had eaten the entire thing standing at the counter, slice after slice, and could I please bring more.
Ingredients
- 5 ½ to 6 cups all-purpose flour: Start with 5 cups and let the dough tell you if it needs more. The humidity in your kitchen changes everything.
- 2 ¼ teaspoons active dry yeast: One standard packet works perfectly. Check the expiration date because old yeast is the reason most bread fails.
- 2 teaspoons salt: Do not reduce this. Salt is what keeps the bread from tasting like plain flour paste.
- 2 cups warm water: Think bathwater temperature, about 110 to 115 degrees. Too hot kills the yeast. Too cold and it will not wake up.
- ⅓ cup granulated sugar: Feeds the yeast and adds just enough sweetness that this bread works for everything from PB and J to dinner rolls.
- ¼ cup vegetable oil: Makes the texture tender and the crumb soft. Canola or light olive oil work too.
Instructions
- Wake up the yeast:
- Stir the sugar into your warm water until it dissolves completely, then sprinkle the yeast on top like you are seasoning a soup. Walk away for 10 minutes. When you come back, there should be a thick layer of foam on top. If the water looks still and lifeless, your yeast was dead and you need to start over.
- Mix the base:
- Pour in the oil and salt, then start adding flour one cup at a time. The dough will go from shaggy to sticky to sort of holding itself together.
- Knead until smooth:
- Turn the dough onto a floured surface and press into it with the heel of your hand. Fold it over, push again, keep this rhythm for 6 to 8 minutes. The dough should feel alive under your hands, smooth and elastic like a stress ball.
- First rise:
- Grease a bowl, plop the dough inside, flip it once to coat all sides in oil, then cover with a clean kitchen towel. Find the warmest spot in your kitchen and leave it alone for an hour. The dough should double in size.
- Shape the loaves:
- Punch the dough down. I mean really give it a firm push with your fist to release all those air bubbles. Cut it in half, tuck the edges under to form smooth rounds, then shape each into a rectangle and place in greased loaf pans.
- Second rise:
- Cover again and let them proof for 30 to 40 minutes. You are looking for the dough to crest about an inch above the rim of the pan. This is when patience really pays off.
- Bake to golden:
- Slide those pans into a 350 degree oven for 30 to 35 minutes. The tops should be a deep golden brown and when you tap the bottom, it should sound hollow.
 Save
Save This recipe became my go to for housewarming gifts and new neighbors. Something about homemade bread says welcome in a way that nothing else quite does.
Getting The Rise Right
Cold drafts are the enemy of rising dough. If your kitchen is drafty, create a little warm zone by turning on your oven for one minute, then turning it off and letting the dough rise inside with the door closed. The residual warmth is perfect.
Shaping Secrets
When you shape the loaves, press down firmly to eliminate any large air pockets. Gently pull the dough tight across the top like you are making a bed. This tension helps the loaf rise upward instead of spreading sideways.
Storage And Freezing
Once the bread is completely cool, wrap it tightly in plastic or store it in a ziplock bag. It keeps beautifully at room temperature for three days. For longer storage, slice the entire loaf first, then freeze slices in a bag and toast straight from frozen.
- Brush the tops with melted butter right out of the oven for the softest crust imaginable
- Substitute honey for the sugar if you want a deeper, more complex flavor
- This dough makes excellent dinner rolls just portion into smaller pieces before baking
 Save
Save There is something profoundly satisfying about pulling two perfect golden loaves from the oven, knowing you made them with your own hands from the simplest ingredients.
Recipe FAQs
- → Why does my bread not rise properly?
-
Ensure your water temperature is between 110–115°F—too hot kills yeast, while too cold prevents activation. Also check that your yeast is fresh and not expired. Let the dough rise in a warm, draft-free area away from cold windows or air conditioning vents.
- → Can I use whole wheat flour instead of all-purpose?
-
You can substitute up to half the all-purpose flour with whole wheat, though the loaf will be denser and slightly less fluffy. For best results, use white whole wheat flour or add vital wheat gluten to maintain structure and tenderness.
- → How do I know when the bread is fully baked?
-
The loaves should be golden brown on top and sound hollow when tapped on the bottom. An instant-read thermometer inserted into the center should read 190–200°F. If the tops brown too quickly, tent loosely with aluminum foil during the final minutes of baking.
- → Why is my crust hard instead of soft?
-
Brushing the tops with butter immediately after removing from the oven creates a softer crust. You can also cover the loaves with a clean kitchen towel while cooling—this traps moisture and keeps the exterior tender. Overbaking will also toughen the crust.
- → Can I make this dough ahead of time?
-
After the first rise, punch down the dough and refrigerate it overnight in a covered bowl. Let it come to room temperature for about 30 minutes before shaping and proceeding with the second rise. This actually enhances flavor development.
- → What's the best way to store homemade bread?
-
Store completely cooled loaves in a plastic bag or wrapped tightly in plastic wrap at room temperature for up to 3 days. Avoid refrigeration, which makes bread stale faster. For longer storage, slice and freeze in freezer bags—toast individual slices straight from frozen.
